Garment Seam Pucker: Types, Causes and Remedies
Last updated on September 4th, 2023 at 11:20 am
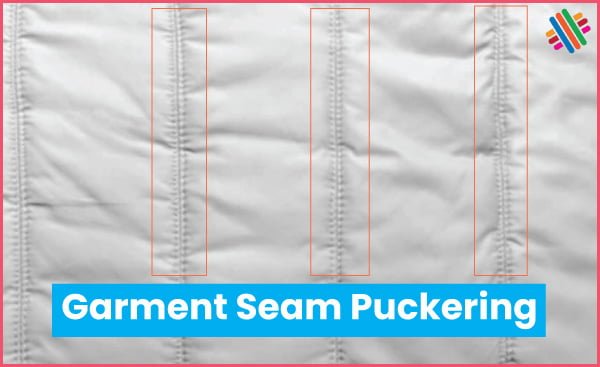
Definition of Seam Pucker
Seam pucker is the most common problem to the making-up trade. It is a problem that also concern fabric finishers, sewing machine manufacturers and sewing thread manufacturers. This problem has been magnified with the introduction of new and unconventional fabrics and finishes.

The common factors which relate to seam pucker are the type of fabric yarns, construction of fabric, type of sewing machine, stitching conditions, sewing thread behavior etc.
Practically it is very difficult to avoid seam pucker, because there must be some buckling along the seam line. Although there is no standard level of acceptability, but we asses the seam pucker visually and it is all a matter of degree. If visually a seam appears to be free of pucker it is acceptable, although technically pucker may be present. The visible effects of pucker can be reduced but cannot be eliminated completely.
Basically there are four type of seam pucker, their probable causes and remedy is discussed briefly below.
Inherent Pucker
The main cause of this type of seam pucker is “Structural jamming” means displacement of fabric yarns by sewing thread results crowding tightly around each stitch. The severity of this condition depends on closeness of weave or knit, fibre characteristics and fabric finishes. Natural fibres are less prone to structural jamming than synthetics. Certain fabric finishes also affects in this regard. Its severity is directly related to sewing thread size and stitch density. Use of multiple needles worsens the condition because of the greater number of penetration. The chain stitch seam is less prone to this type of pucker than lock stitch seam.
Seam pucker due to structural jamming could be tested easily by preparing a seam along the warp and then cut every stitch on face and back. If the pucker does not disappear, then it is due to structural jamming.
Some improvement could be made by changing, where possible, to a finer needle and thread and reducing the number of stitches per unit length. Sewing slightly at a bias angle respective to fabric yarn also works.
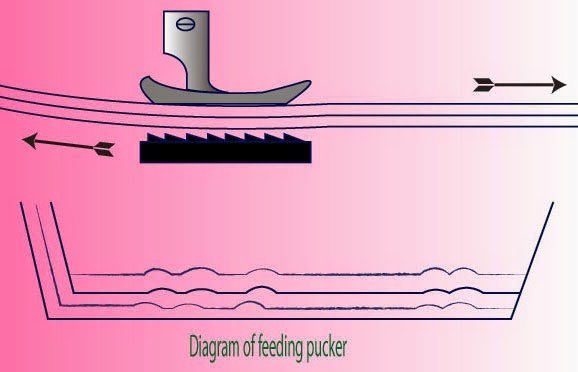
Feeding Pucker
This type of pucker appears due to differential feeding of top and bottom plies of fabrics. There are many causes of differential feeding but the two main causes are:
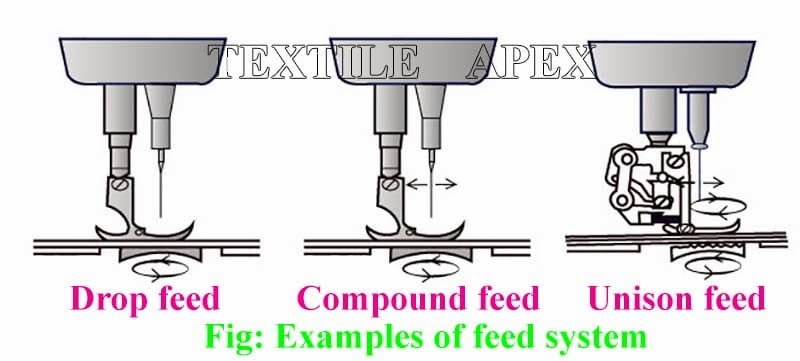
- The limitation of the simple drop feed mechanism to transport two or more plies of fabric through the sewing machine wholly by mechanical means.
- In case of smooth surfaced fabrics, slippage of one ply of fabric against other during feeding in sewing machine.
The seam pucker due to differential feeding could be detected by a simple test. Two pieces of fabrics marked in one centimeter intervals, after seaming, (if marking matches and pucker appears then it is due to other reason) if marking does not match and pucker appears, then it is due to differential feeding.
There are special machines with puller feeds, compound feeds and other improved feeding mechanisms which help to reduce feeding pucker. If conventional drop feed machines are used then the following precautions will be found helpful:
- Where different types of fabrics are joined together, less extensible fabric should be on top.
- Use of fine and sharp-toothed feed-dogs.
- Proper setting of the pressure of the pressure foot to obtain satisfactory needle penetration through the fabric.
- If the back of the feed dog is slightly lifted up to create a pulling effect away from the needle, then it works in most cases.
- Re-setting of the feed timing so that the material is completely at rest while the needle is touching the fabric.

Another technique also works, if the operator adopt a nip and run sewing technique, that is, the seam should be nipped by the forefinger and thumb of the left hand just behind the pressure foot and similarly by right hand at a suitable position in front of the pressure-foot.
Tension Pucker
Unnecessary high tension of the sewing threads is the main cause of this type of seam pucker, although the effect may not be visible immediately after seaming. The stretch of the cloth during its manipulation by the machine operator also contributes to this fact. The usual methods of reducing tension pucker are:
- By setting the thread tension as light as possible so that machine can produce a satisfactory balanced stitch.
- By making sure that the machine is working properly.
Thread Shrinkage Pucker
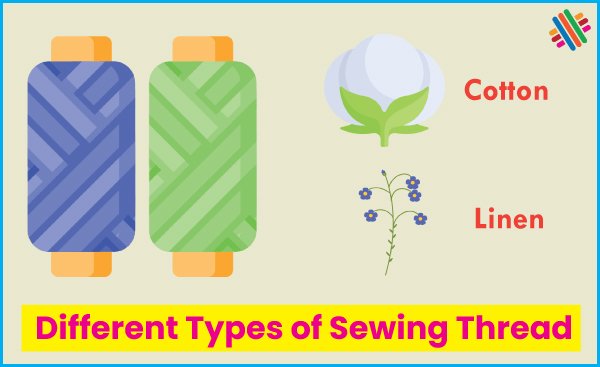
A sewing thread should possess the same shrinkage property as the fabric into which it is stitched. If the sewing thread used is dimensionally unstable in washing or wetting or permanent pressing or hot box laundering, then the seam pucker may be visible due to sewing thread shrinkage. This problem mainly arises when cotton thread is used.
To avoid this type of defect, it is better to use spun polyester threads which are dimensionally stable in washing, wetting and at temperature up to 150o C. Cotton thread with special finishes may also be used. If cotton threads are required to use, a slight looseness of stitches is necessary to compensate for thread shrinkage when wet.
You may also like: Common Sewing Machine Problems and How to Fix Them


Appreciating the persistence you put into your blog and detailed information you provide.
I’ve read your blog. Honestly I’ve never read this type of blog before. Appreciate your work and will love to read your incoming articles too.